Implementing In-App purchases in your NativeScript application (Part 3)
After I showed you how to create a simple NativeScript application that implements in-app workflow using the nativescript-purchase plugin and how to set up and sandbox test the workflow on iOS. Now it is time to do same thing on Android.
Preliminary Notes
Before we start you must understand that if you want to test the full workflow you will either need a physical Android device, or your emulator must have the full-blown Google Play services installed (with the Play Store and other stuff). So you cannot test this on the stock Android emulator that comes with Android SDK. This is because the in-app purchase services extensively use the play store to communicate with Google’s services.
Also I’m assuming that your Google account (the one with which you publish your app) is set up as a merchant account, which is needed if you want to use in-app purchases. If it is not you can take a look at this help article on how to set it up.
Set up test accounts
The first step we will take is to add which Google accounts will be able to sandbox test the purchases in our app. In order to do so you must go to the Google Play Console->Settings->Developer account->Account details. Scroll down to the License Testing section and in the field add as a comma-separated value the Google Accounts that will be treated as sandbox test users.
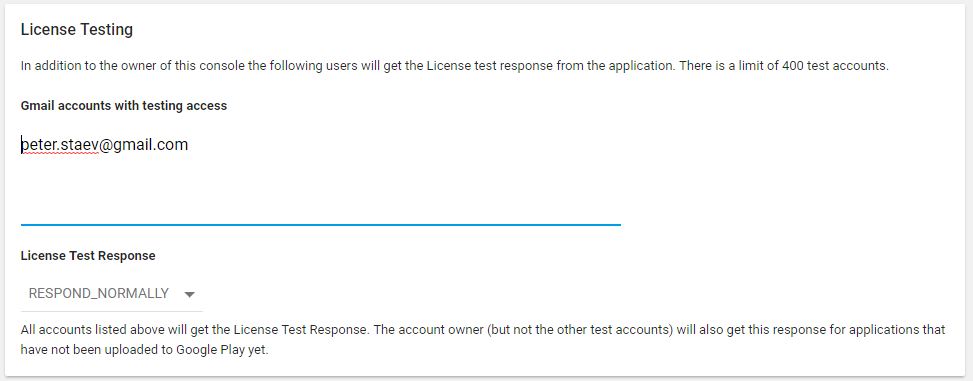
NB: Those accounts are considered sandbox purchase testers for ALL applications that are published through your Google Play developer account.
Create and set up the application in Google Play console
Next we should add our application to the Google Play developer console. I will not go in details on how you create it as there is nothing special compared to creating a normal application. Just make sure you fill in all the needed details (like screenshots, feature graphic, icons, etc.) as unlike iOS for Android we will actually need to publish our app. You will also need to upload your binary. Since my demo app does not do anything, I will be uploading it to the Alpha release with a closed Alpha testing so it is not public on the store.
Once you have created the application, before we publish it we need to add our in-app products. So lets head over to the In-app products section in the Google Play console and add our first product
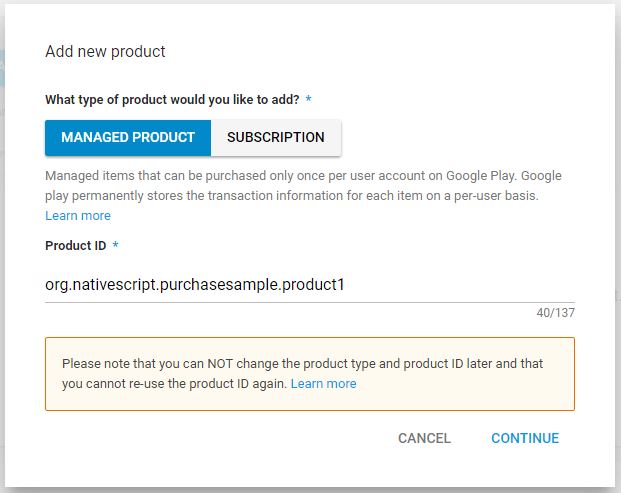
Remember that for now the nativescript-purchase plugin does not support subscriptions so make sure you select the Managed Product option and also make sure you type the exact same product id we have set up in the initialization of the purchase plugin: org.nativescript.purchasesample.product1. Next is to set up the product details and pricing (I’m using the same description as for iOS):
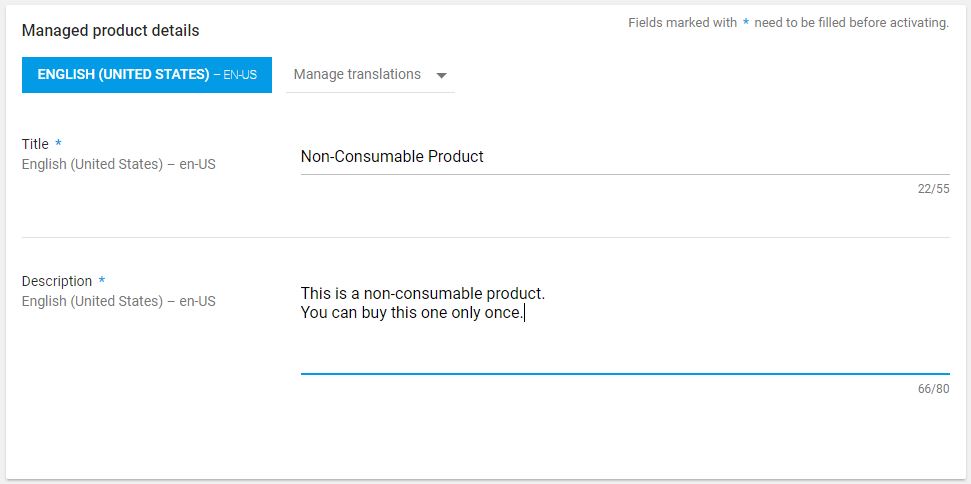
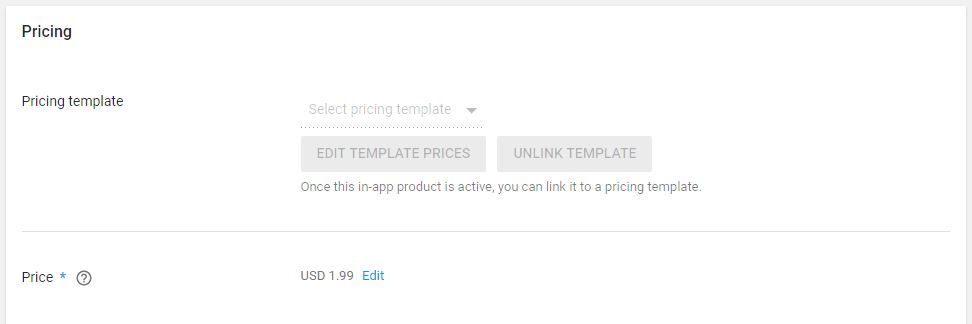
Once you save this product remember to make it active via the drop down next to the save! 🙂
We repeat the above procedure for the second product org.nativescript.purchasesample.product2. Although this is our consumable product for Android there is no set up difference between the two like it was for iOS. The consuming is done in our NativeScript code. After you add the second product, your in-app product listing should look similar to this:

Now we are ready to publish our application! Note that it can take up to several hours for the application and in-app products to be published to Google Play, so we must wait for this to happen, before we can test it.
Sandbox testing purchases
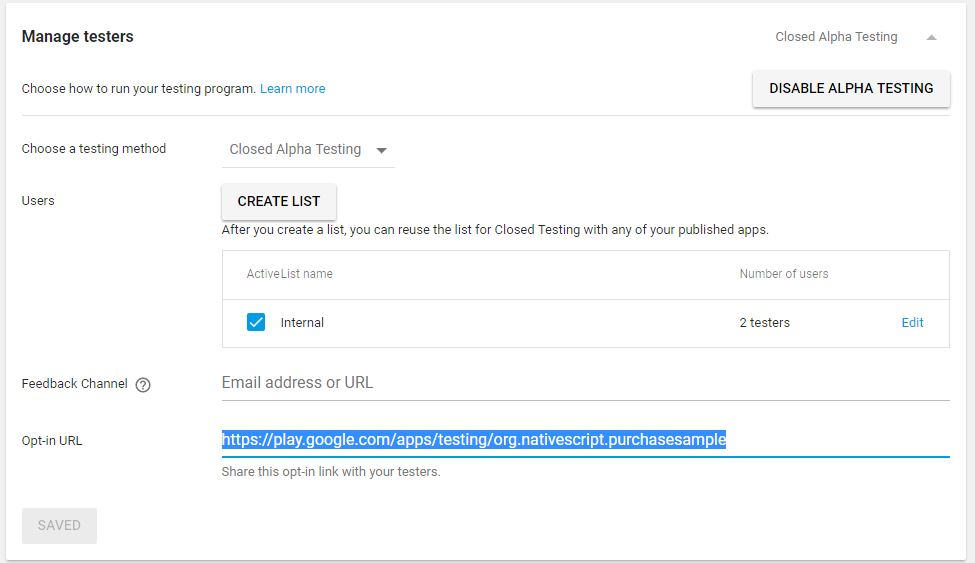
Once the application is in Published status we can start our testing. Note that if you used a closed Alpha testing option you need to go to the Releases menu and open the Opt-in URL with the accounts which you assigned as testers.
NB: You cannot sandbox test purchases by deploying your app via tns run android or by any other means. You NEED to install the application from the Google Play store.
Now lets head over to the Play Store and find our app. Make sure you are signed in on the device with the same tester account you have added as a license test user at the start. In my experience it is sometimes very difficult to find the app in the store via search as it takes some additional time after publishing for Google to correctly update their index. So it might be best to just open the play store listing for the app directly by opening the following Url in the device’s browser: https://play.google.com/store/apps/details?id=<PACKAGE ID>
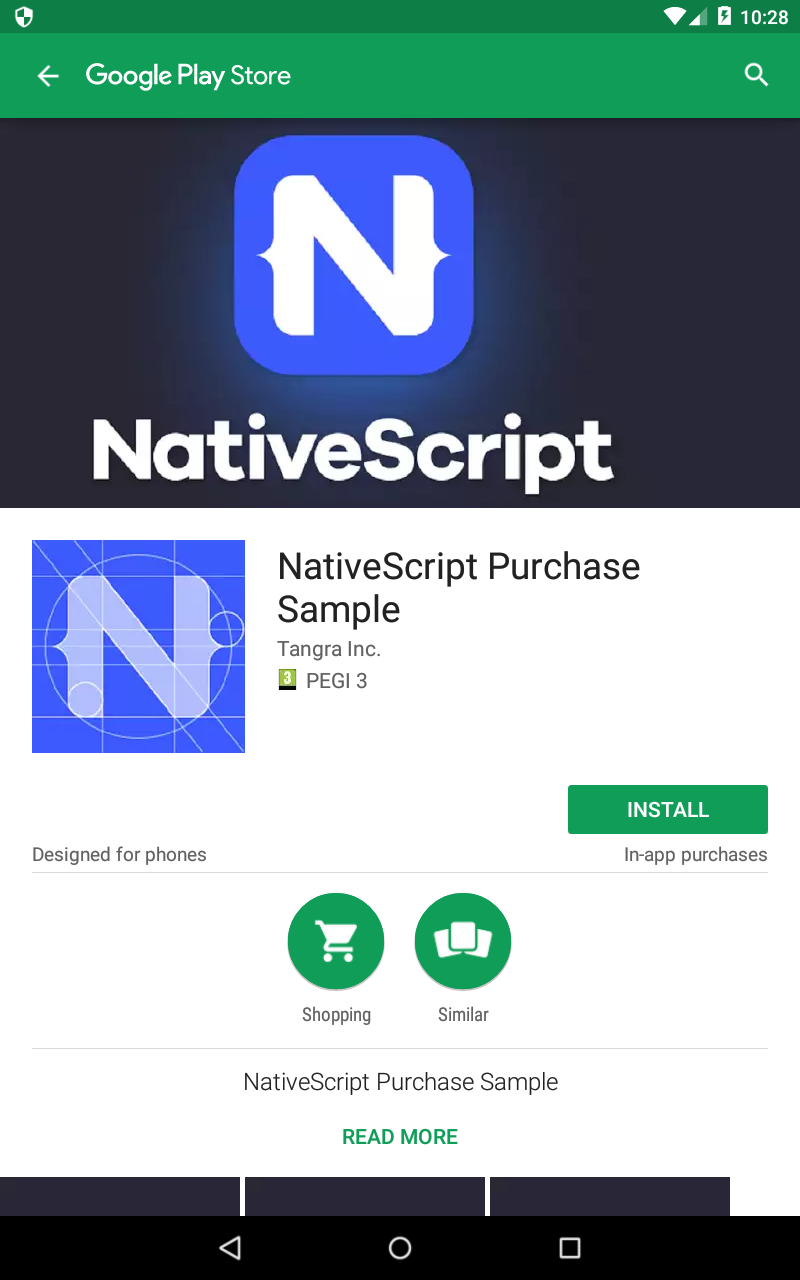
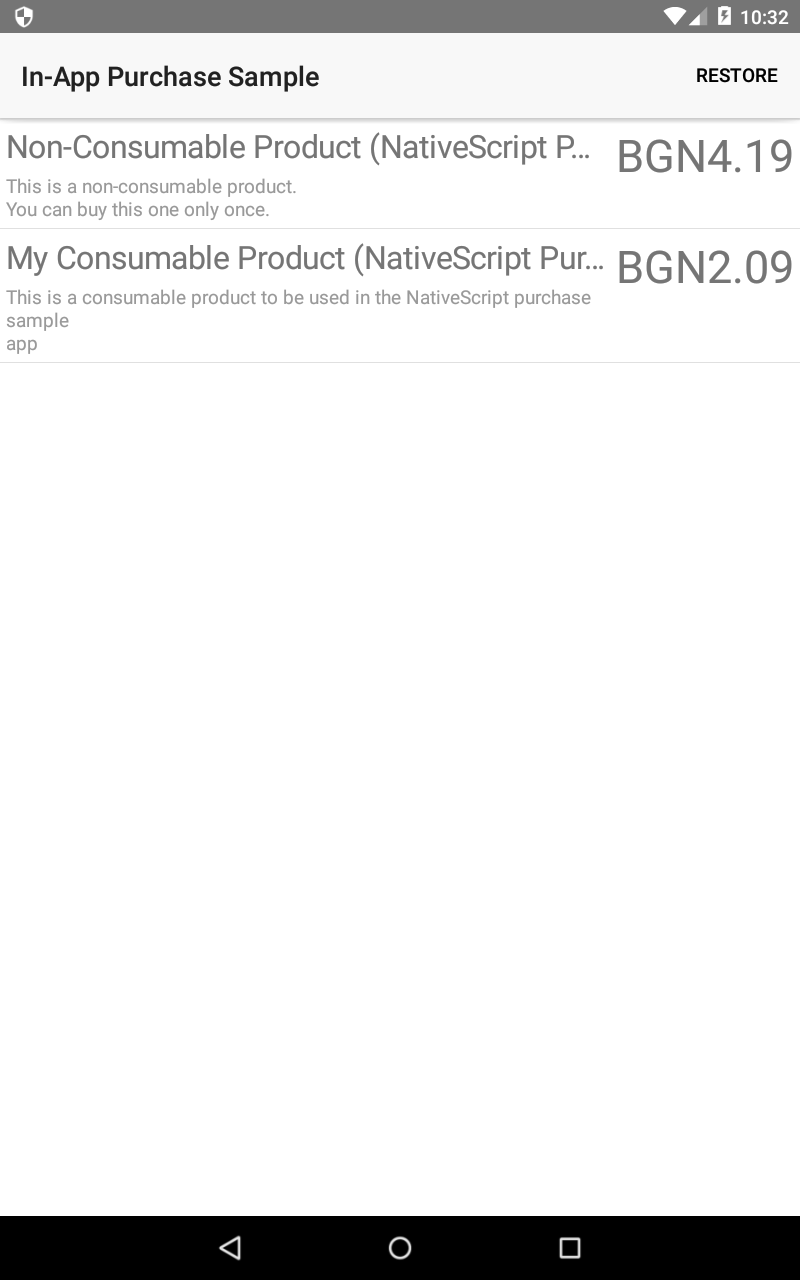
So lets install and open it. If everything is done correctly you should see a similar to the iOS listing of the products we have added:
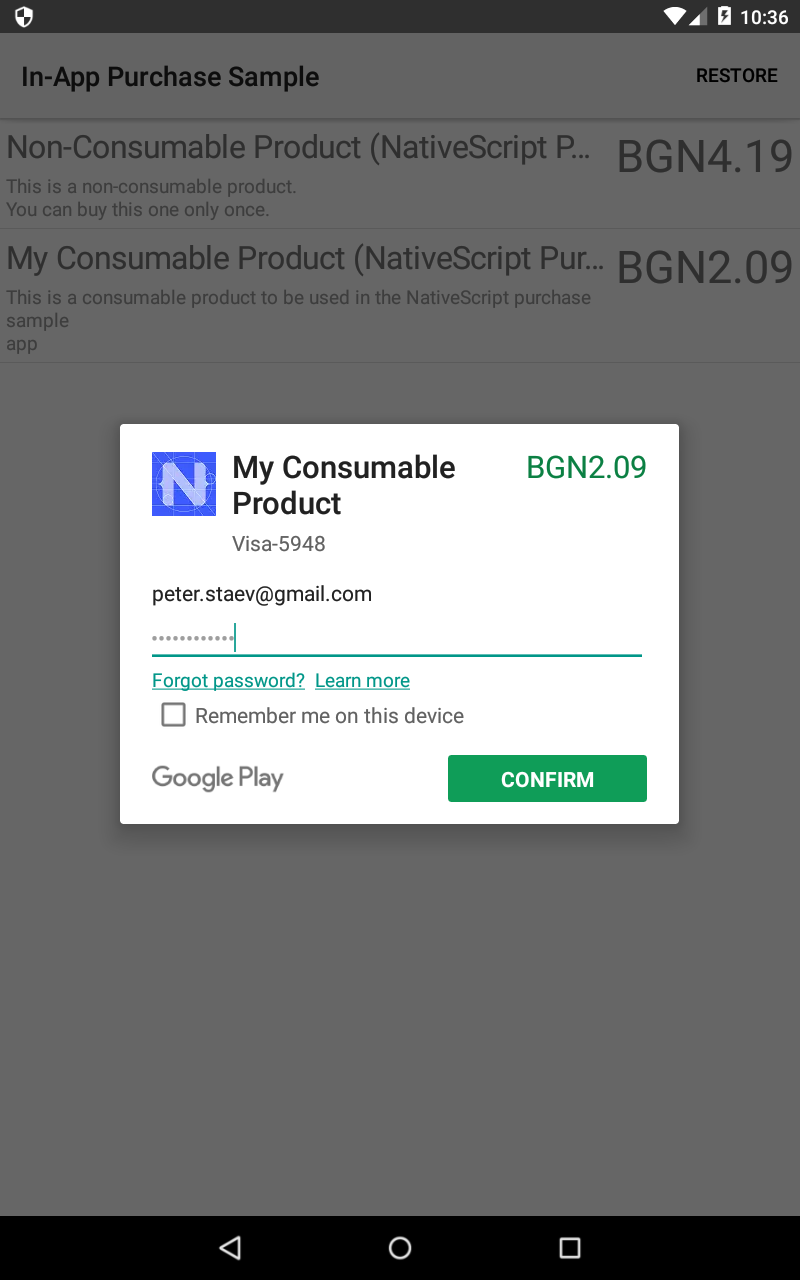
If you tap on a product you will be presented with the popup to confirm your purchase. Take note of the bold line below the price that indicates that this is a sandbox purchase and that your credit card will not be charged.
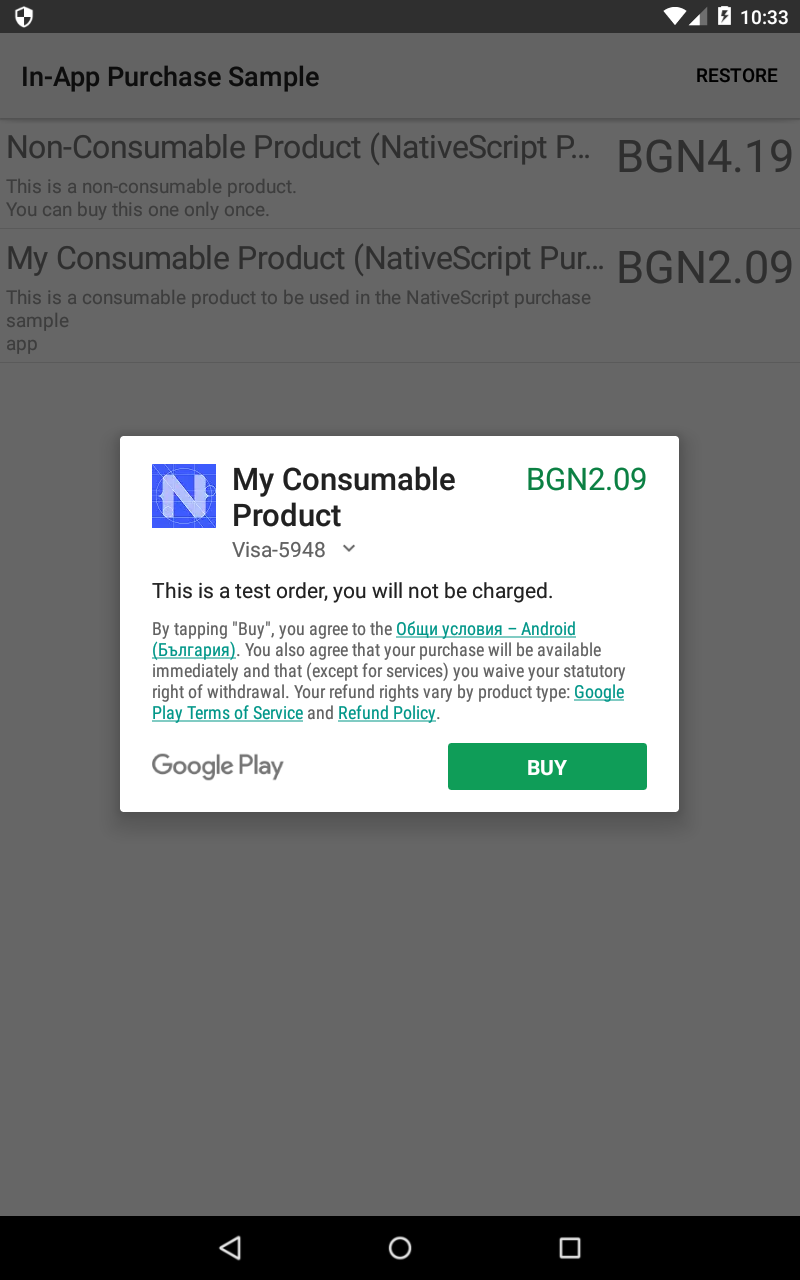
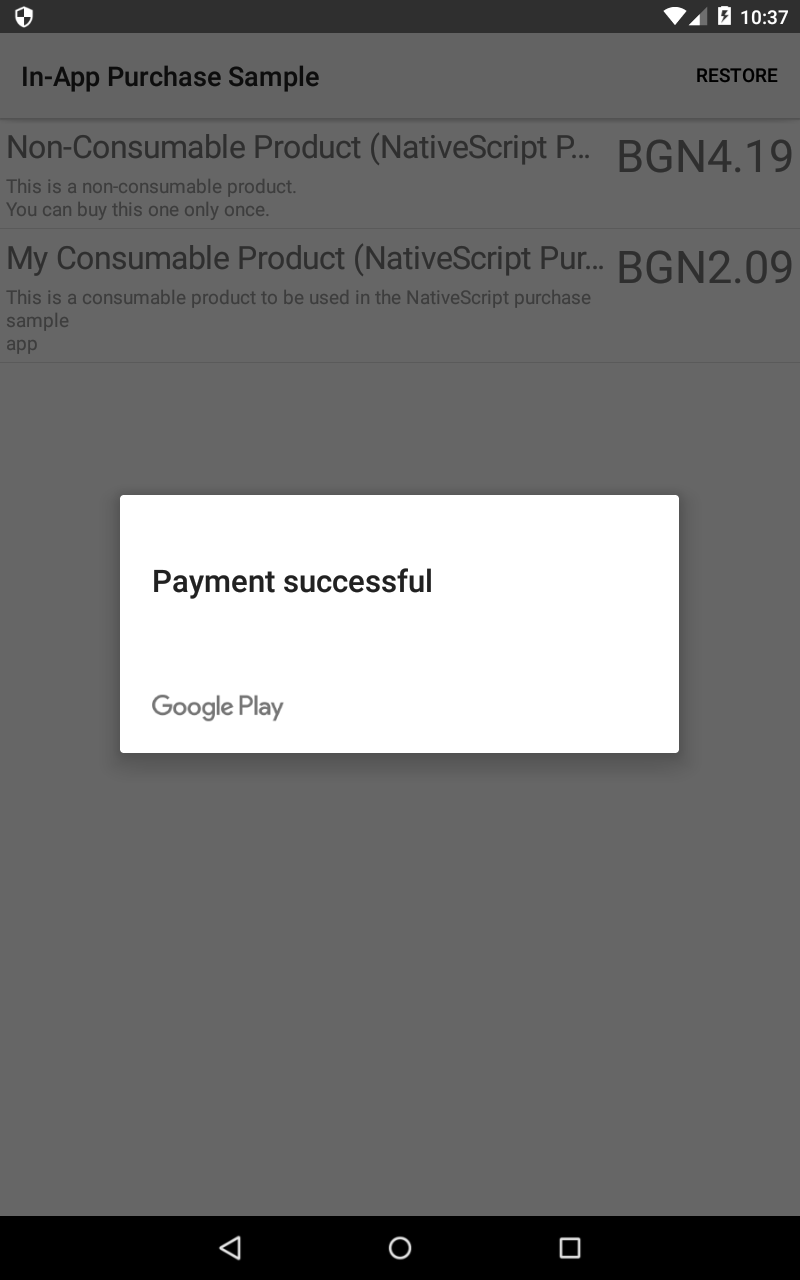
Once you confirm the purchase you will get a notification that the it was successfully!
NB: You cannot use the same developer Google account that published the app for testing. You must set up and use another Google account for sandbox purchases.
Wrapping it up
As you can see testing on Android is a little bit harder than on iOS, especially if you want to debug something. This is due to the fact that you need to upload your APK to the Play Store, wait for the update to be published and then download it to the device. This makes it really difficult to iron out any bugs or trace problems. That’s why my personal recommendation is to first implement and thoroughly test your workflow and logic on iOS. Once you are sure it is working flawlessly then move to test it on Android.